安装
安装Kafka-Operator
创建命名空间
kubectl create namespace kafka下载https://strimzi.io/install/latest?namespace=kafka并重命名为install.yaml,执行安装
kubectl create -f install.yaml -n kafka创建kafka集群
下载https://strimzi.io/examples/latest/kafka/kafka-persistent-single.yaml,修改内容:
apiVersion: kafka.strimzi.io/v1beta2
kind: Kafka
metadata:
  name: mykafka # 集群名称
  namespace: kafka # 增加一行命名空间
spec:
  kafka:
    version: 3.2.0
    replicas: 3 # kafka节点数
    listeners:
      - name: plain
        port: 9092
        type: internal
        tls: false
      - name: tls
        port: 9093
        type: internal
        tls: true
    config: # 根据情况修改
      offsets.topic.replication.factor: 3
      transaction.state.log.replication.factor: 3
      transaction.state.log.min.isr: 1
      default.replication.factor: 3
      min.insync.replicas: 1
      inter.broker.protocol.version: "3.2"
    storage:
      type: jbod
      volumes:
      - id: 0
        type: persistent-claim
        class: local-path # 使用local-path这个storageclass
        size: 100Gi
        deleteClaim: false
  zookeeper:
    replicas: 3 # zk节点数
    storage:
      type: persistent-claim
      class: local-path # 使用local-path这个storageclass
      size: 100Gi
      deleteClaim: false
  entityOperator:
    topicOperator: {}
    userOperator: {}
注意用#注释的部分,视情况修改。其中namespace尤其重要,一定要填
创建集群:
kubectl apply -f kafka-persistent-single.yaml不要在意kafka-persistent-single.yaml这个文件的命名,官方给的example就是这个名,你可以更改为任意名字。
查看pods:

查看svc:

集群内使用连接kafka只需只用mykafka-kafka-bootstrap:9092,例如生产数据:
kubectl -n kafka run kafka-producer -ti \
  --image=quay.io/strimzi/kafka:0.30.0-kafka-3.2.0 \
  --rm=true --restart=Never -- bin/kafka-console-producer.sh \
  --bootstrap-server mykafka-kafka-bootstrap:9092 \
  --topic my-topic
消费数据:
kubectl -n kafka run kafka-consumer -ti \
  --image=quay.io/strimzi/kafka:0.30.0-kafka-3.2.0 \
  --rm=true --restart=Never -- bin/kafka-console-consumer.sh \
  --bootstrap-server mykafka-kafka-bootstrap:9092 \
  --topic my-topic --from-beginning
对外暴露服务
安装好集群默认只能k8s集群内部访问,如果需要对外暴露,修改配置文件listeners,如下:
listeners:
  - name: plain
    port: 9092
    type: internal
    tls: false
  - name: tls
    port: 9093
    type: internal
    tls: true
  - name: external # 增加外部访问用的linstener
    port: 9094 #端口
    type: nodeport # nodeport类型
    tls: false
    configuration:
      bootstrap:
nodePort: 32094 # 指定nodeport端口,不指定会随机分配执行kubectl apply -f kafka-persistent-single.yaml使配置生效,kafka operator会自动帮你重启kafka。
查看svc:

也可以使用kubectl get kafka -n kafka -o yaml看到监听信息:

上图中的10.211.55.5等三个ip是我服务器的ip。为了验证外部可访问,我另外找了一台机器,下载了一个原生的kafka包,消费一下:
./kafka-console-consumer.sh --bootstrap-server=10.211.55.5:32094,10.211.55.4:32094,10.211.55.3:32094 \
--topic my-topic --from-beginning
消费成功:

但如果你是用云服务,有一点需要注意:以上对外暴露的方法,只能使用云服务器的内网ip进行访问,无法使用公网ip访问,因为对于云服务器本身来说,它是感知不到公网ip的,而且安装k8s时用的也是内网ip进行安装。
为了能够用公网ip进行访问,可以按如下方法配置:
listeners:
  - name: plain
    port: 9092
    type: internal
    tls: false
  - name: tls
    port: 9093
    type: internal
    tls: true
  - name: external
    port: 9094
    type: nodeport
    tls: false
    configuration:
      bootstrap:
        nodePort: 32094
  - name: pubexternal # 公网访问的
    port: 9095
    type: nodeport
    tls: false
    configuration:
      bootstrap:
        nodePort: 32095 # nodeport端口
      brokers:
      - broker: 0
        advertisedHost: 10.10.10.1 # 公网ip
      - broker: 1
        advertisedHost: 10.10.10.2 # 公网ip
      - broker: 2
        advertisedHost: 10.10.10.3 # 公网ip
kubectl get kafka -n kafka -o yaml看到监听信息:

Broker配置
安装集群时用的yaml中就包含了kafka broker的配置:

具体配置项直接参考kafka官网:Apache Kafka
不过有小部分配置项是不支持在这里修改:

为了验证配置,我们将“自动创建topic”设置为false:
config:
  auto.create.topics.enable: false
kafka启动时日志会打印配置,可以查看日志:
kubectl logs mykafka-kafka-0 -n kafka使用不存在的topic来生产数据,发现报UNKNOWN_TOPIC_OR_PARTITION错误,可见配置生效

Operator
我们安装了Operator之后,通过kubectl get pods -n kafka可以看到有两个operator的pod:
AME                                        READY   STATUS    RESTARTS   AGE
mykafka-entity-operator-df697469d-lmwtq        3/3     Running   0          11h
mykafka-kafka-0                                1/1     Running   0          11h
mykafka-kafka-exporter-5db54494d6-f2mm8        1/1     Running   0          11h
mykafka-zookeeper-0                            1/1     Running   0          11h
strimzi-cluster-operator-8677464d48-7dgf7      1/1     Running   0          32h
其中cluster-operator就是帮助我们创建集群的,而entity-operator中包含了topic operator和user operator
TopicOperator
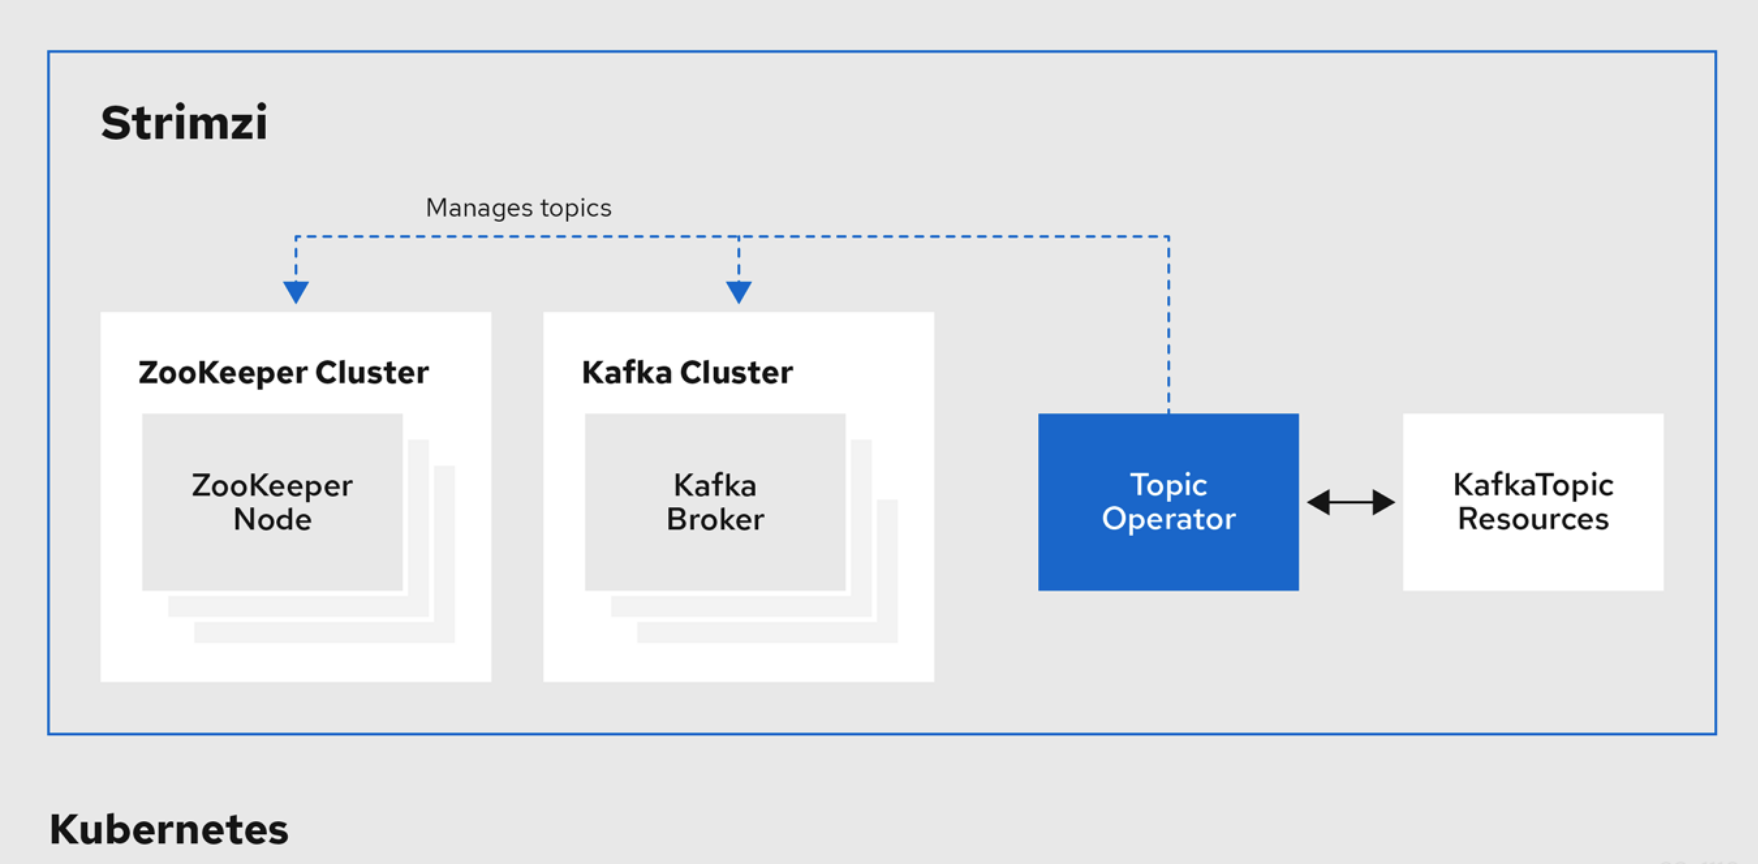
topic operator的架构图如下:
 我们可以通过创建一个KafkaTopic类型的K8S资源,来让TopicOperator帮你自动创建主题:
topic.yaml:
apiVersion: kafka.strimzi.io/v1beta2
kind: KafkaTopic
metadata:
  name: test-topic #主题名称
  namespace: kafka
  labels:
    strimzi.io/cluster: "mykafka" # 集群名
spec:
  partitions: 3 # 分区数
  replicas: 1 # 副本数
kubectl apply -f topic.yaml比较牛逼的是,如果你以后想增加主题的分区数,只需要修改topic.yaml中的spec.partitions再apply即可。注意分区数只能增加,不能减少,replicas不能修改。
要小心的是,如果你执行了kubectl delete -f topic.yaml,这个主题就被删掉了,因此如果你使用这种方式来管理topic,一定要小心。
UserOperator
同理,user operator可以帮助你管理kafka用户,可以参考官方给的例子:strimzi-kafka-operator/kafka-user.yaml
apiVersion: kafka.strimzi.io/v1beta2
kind: KafkaUser
metadata:
  name: my-user
  labels:
    strimzi.io/cluster: my-cluster
spec:
  authentication:
    type: tls
  authorization:
    type: simple
    acls:
      # Example consumer Acls for topic my-topic using consumer group my-group
      - resource:
          type: topic
          name: my-topic
          patternType: literal
        operation: Read
        host: "*"
      - resource:
          type: topic
          name: my-topic
          patternType: literal
        operation: Describe
        host: "*"
      - resource:
          type: group
          name: my-group
          patternType: literal
        operation: Read
        host: "*"
      # Example Producer Acls for topic my-topic
      - resource:
          type: topic
          name: my-topic
          patternType: literal
        operation: Write
        host: "*"
      - resource:
          type: topic
          name: my-topic
          patternType: literal
        operation: Create
        host: "*"
      - resource:
          type: topic
          name: my-topic
          patternType: literal
        operation: Describe
        host: "*"
Kafka Bridge
这是一个通过http来使用kafka的桥接组件,我们可以创建一个bridge:
kind: KafkaBridge
metadata:
  name: my-bridge
  namespace: kafka
spec:
  replicas: 1
  bootstrapServers: mykafka-kafka-bootstrap:9092
  http:
port: 8080然后会多一个bridge的pod,为了方便测试,我们直接使用kubectl get pods -n kafka -o wide查看pod的ip(你也可以创建service)。
然后使用http接口查看bridge支持哪些api:
curl 100.72.162.179:8080/openapi这个接口会返回一个JSON格式的openapi,从中可以看到所有api定义。
例如查看topic列表:
curl -s 100.72.162.179:8080/topics | jq .
[
  "__strimzi_store_topic",
  "test-topic",
  "__strimzi-topic-operator-kstreams-topic-store-changelog"
]
查看指定topic:
curl -s 100.72.162.179:8080/topics/test-topic | jq .
{
  "name": "test-topic",
  "configs": {
    "compression.type": "producer",
    "leader.replication.throttled.replicas": "",
    "message.downconversion.enable": "true",
    "min.insync.replicas": "1",
    "segment.jitter.ms": "0",
    "cleanup.policy": "delete",
    "flush.ms": "9223372036854775807",
    "follower.replication.throttled.replicas": "",
    "segment.bytes": "1073741824",
    "retention.ms": "604800000",
    "flush.messages": "9223372036854775807",
    "message.format.version": "3.0-IV1",
    "max.compaction.lag.ms": "9223372036854775807",
    "file.delete.delay.ms": "60000",
    "max.message.bytes": "1048588",
    "min.compaction.lag.ms": "0",
    "message.timestamp.type": "CreateTime",
    "preallocate": "false",
    "min.cleanable.dirty.ratio": "0.5",
    "index.interval.bytes": "4096",
    "unclean.leader.election.enable": "false",
    "retention.bytes": "-1",
    "delete.retention.ms": "86400000",
    "segment.ms": "604800000",
    "message.timestamp.difference.max.ms": "9223372036854775807",
    "segment.index.bytes": "10485760"
  },
  "partitions": [
    {
      "partition": 0,
      "leader": 0,
      "replicas": [
        {
          "broker": 0,
          "leader": true,
          "in_sync": true
        }
      ]
    },
    {
      "partition": 1,
      "leader": 0,
      "replicas": [
        {
          "broker": 0,
          "leader": true,
          "in_sync": true
        }
      ]
    },
    {
      "partition": 2,
      "leader": 0,
      "replicas": [
        {
          "broker": 0,
          "leader": true,
          "in_sync": true
        }
      ]
    },
    {
      "partition": 3,
      "leader": 0,
      "replicas": [
        {
          "broker": 0,
          "leader": true,
          "in_sync": true
        }
      ]
    }
  ]
}更多信息参考官网:Strimzi Kafka Bridge Documentation (0.21.6)
监控
部署监控系统
首先按照使用Prometheus-Operator搭建监控集群先部署好一套监控系统
修改配置
根据官方提供的kafka-metrics.yaml修改之前创建kafka集群时用的kafka-persistent-single.yaml,修改后如下(注意看注释的部分,其他部分和文章前半部分有所不同,因为我的试验环境换了):
apiVersion: kafka.strimzi.io/v1beta2
kind: Kafka
metadata:
  name: real
  namespace: kafka
spec:
  kafka:
    version: 3.2.0
    replicas: 1
    listeners:
      - name: plain
        type: internal
        port: 9092
        tls: false
      - name: external
        type: nodeport
        port: 32094
        tls: false
        configuration:
          bootstrap:
            nodePort: 32094
      - name: tls
        port: 9093
        type: nodeport
        tls: true
    config:
      offsets.topic.replication.factor: 1
      transaction.state.log.replication.factor: 1
      transaction.state.log.min.isr: 1
      default.replication.factor: 1
      min.insync.replicas: 1
      inter.broker.protocol.version: "3.2"
    storage:
      type: jbod
      volumes:
      - id: 0
        type: persistent-claim
        size: 100Gi
        class: local-path
        deleteClaim: false
    metricsConfig: # kafka监控
      type: jmxPrometheusExporter
      valueFrom:
        configMapKeyRef:
          name: kafka-metrics
          key: kafka-metrics-config.yml
  zookeeper:
    replicas: 3
    storage:
      type: persistent-claim
      size: 100Gi
      class: local-path
      deleteClaim: false
     metricsConfig: # zk监控
      type: jmxPrometheusExporter
      valueFrom:
        configMapKeyRef:
          name: kafka-metrics
          key: zookeeper-metrics-config.yml
  entityOperator:
    topicOperator: {}
    userOperator: {}
  kafkaExporter: # 增加kafka exporter监控
    topicRegex: ".*"
    groupRegex: ".*"
# 以下都是新增的
---
kind: ConfigMap
apiVersion: v1
metadata:
  name: kafka-metrics
  namespace: kafka # 这里要加上命名空间
  labels:
    app: strimzi
data:
  kafka-metrics-config.yml: |
    # See https://github.com/prometheus/jmx_exporter for more info about JMX Prometheus Exporter metrics
    lowercaseOutputName: true
    rules:
    # Special cases and very specific rules
    - pattern: kafka.server<type=(.+), name=(.+), clientId=(.+), topic=(.+), partition=(.*)><>Value
      name: kafka_server_$1_$2
      type: GAUGE
      labels:
       clientId: "$3"
       topic: "$4"
       partition: "$5"
    - pattern: kafka.server<type=(.+), name=(.+), clientId=(.+), brokerHost=(.+), brokerPort=(.+)><>Value
      name: kafka_server_$1_$2
      type: GAUGE
      labels:
       clientId: "$3"
       broker: "$4:$5"
    - pattern: kafka.server<type=(.+), cipher=(.+), protocol=(.+), listener=(.+), networkProcessor=(.+)><>connections
      name: kafka_server_$1_connections_tls_info
      type: GAUGE
      labels:
        cipher: "$2"
        protocol: "$3"
        listener: "$4"
        networkProcessor: "$5"
    - pattern: kafka.server<type=(.+), clientSoftwareName=(.+), clientSoftwareVersion=(.+), listener=(.+), networkProcessor=(.+)><>connections
      name: kafka_server_$1_connections_software
      type: GAUGE
      labels:
        clientSoftwareName: "$2"
        clientSoftwareVersion: "$3"
        listener: "$4"
        networkProcessor: "$5"
    - pattern: "kafka.server<type=(.+), listener=(.+), networkProcessor=(.+)><>(.+):"
      name: kafka_server_$1_$4
      type: GAUGE
      labels:
       listener: "$2"
       networkProcessor: "$3"
    - pattern: kafka.server<type=(.+), listener=(.+), networkProcessor=(.+)><>(.+)
      name: kafka_server_$1_$4
      type: GAUGE
      labels:
       listener: "$2"
       networkProcessor: "$3"
    # Some percent metrics use MeanRate attribute
    # Ex) kafka.server<type=(KafkaRequestHandlerPool), name=(RequestHandlerAvgIdlePercent)><>MeanRate
    - pattern: kafka.(\w+)<type=(.+), name=(.+)Percent\w*><>MeanRate
      name: kafka_$1_$2_$3_percent
      type: GAUGE
    # Generic gauges for percents
    - pattern: kafka.(\w+)<type=(.+), name=(.+)Percent\w*><>Value
      name: kafka_$1_$2_$3_percent
      type: GAUGE
    - pattern: kafka.(\w+)<type=(.+), name=(.+)Percent\w*, (.+)=(.+)><>Value
      name: kafka_$1_$2_$3_percent
      type: GAUGE
      labels:
        "$4": "$5"
    # Generic per-second counters with 0-2 key/value pairs
    - pattern: kafka.(\w+)<type=(.+), name=(.+)PerSec\w*, (.+)=(.+), (.+)=(.+)><>Count
      name: kafka_$1_$2_$3_total
      type: COUNTER
      labels:
        "$4": "$5"
        "$6": "$7"
    - pattern: kafka.(\w+)<type=(.+), name=(.+)PerSec\w*, (.+)=(.+)><>Count
      name: kafka_$1_$2_$3_total
      type: COUNTER
      labels:
        "$4": "$5"
    - pattern: kafka.(\w+)<type=(.+), name=(.+)PerSec\w*><>Count
      name: kafka_$1_$2_$3_total
      type: COUNTER
    # Generic gauges with 0-2 key/value pairs
    - pattern: kafka.(\w+)<type=(.+), name=(.+), (.+)=(.+), (.+)=(.+)><>Value
      name: kafka_$1_$2_$3
      type: GAUGE
      labels:
        "$4": "$5"
        "$6": "$7"
    - pattern: kafka.(\w+)<type=(.+), name=(.+), (.+)=(.+)><>Value
      name: kafka_$1_$2_$3
      type: GAUGE
      labels:
        "$4": "$5"
    - pattern: kafka.(\w+)<type=(.+), name=(.+)><>Value
      name: kafka_$1_$2_$3
      type: GAUGE
    # Emulate Prometheus 'Summary' metrics for the exported 'Histogram's.
    # Note that these are missing the '_sum' metric!
    - pattern: kafka.(\w+)<type=(.+), name=(.+), (.+)=(.+), (.+)=(.+)><>Count
      name: kafka_$1_$2_$3_count
      type: COUNTER
      labels:
        "$4": "$5"
        "$6": "$7"
    - pattern: kafka.(\w+)<type=(.+), name=(.+), (.+)=(.*), (.+)=(.+)><>(\d+)thPercentile
      name: kafka_$1_$2_$3
      type: GAUGE
      labels:
        "$4": "$5"
        "$6": "$7"
        quantile: "0.$8"
    - pattern: kafka.(\w+)<type=(.+), name=(.+), (.+)=(.+)><>Count
      name: kafka_$1_$2_$3_count
      type: COUNTER
      labels:
        "$4": "$5"
    - pattern: kafka.(\w+)<type=(.+), name=(.+), (.+)=(.*)><>(\d+)thPercentile
      name: kafka_$1_$2_$3
      type: GAUGE
      labels:
        "$4": "$5"
        quantile: "0.$6"
    - pattern: kafka.(\w+)<type=(.+), name=(.+)><>Count
      name: kafka_$1_$2_$3_count
      type: COUNTER
    - pattern: kafka.(\w+)<type=(.+), name=(.+)><>(\d+)thPercentile
      name: kafka_$1_$2_$3
      type: GAUGE
      labels:
        quantile: "0.$4"
  zookeeper-metrics-config.yml: |
    # See https://github.com/prometheus/jmx_exporter for more info about JMX Prometheus Exporter metrics
    lowercaseOutputName: true
    rules:
    # replicated Zookeeper
    - pattern: "org.apache.ZooKeeperService<name0=ReplicatedServer_id(\\d+)><>(\\w+)"
      name: "zookeeper_$2"
      type: GAUGE
    - pattern: "org.apache.ZooKeeperService<name0=ReplicatedServer_id(\\d+), name1=replica.(\\d+)><>(\\w+)"
      name: "zookeeper_$3"
      type: GAUGE
      labels:
        replicaId: "$2"
    - pattern: "org.apache.ZooKeeperService<name0=ReplicatedServer_id(\\d+), name1=replica.(\\d+), name2=(\\w+)><>(Packets\\w+)"
      name: "zookeeper_$4"
      type: COUNTER
      labels:
        replicaId: "$2"
        memberType: "$3"
    - pattern: "org.apache.ZooKeeperService<name0=ReplicatedServer_id(\\d+), name1=replica.(\\d+), name2=(\\w+)><>(\\w+)"
      name: "zookeeper_$4"
      type: GAUGE
      labels:
        replicaId: "$2"
        memberType: "$3"
    - pattern: "org.apache.ZooKeeperService<name0=ReplicatedServer_id(\\d+), name1=replica.(\\d+), name2=(\\w+), name3=(\\w+)><>(\\w+)"
      name: "zookeeper_$4_$5"
      type: GAUGE
      labels:
        replicaId: "$2"
memberType: "$3"执行kubectl apply -f kafka-persistent-single.yaml 自动重启kafka,这样kafka监控接口就暴露出来了。
下载strimzi-pod-monitor.yaml,让prometheus自动发现并拉取kafka监控数据:
kubectl apply -f strimzi-pod-monitor.yamlGrafana Dashboard
打开grafana页面,导入官方提供的dashboard:strimzi-kafka-operator/examples/metrics/grafana-dashboards at main · strimzi/strimzi-kafka-operator (github.com)
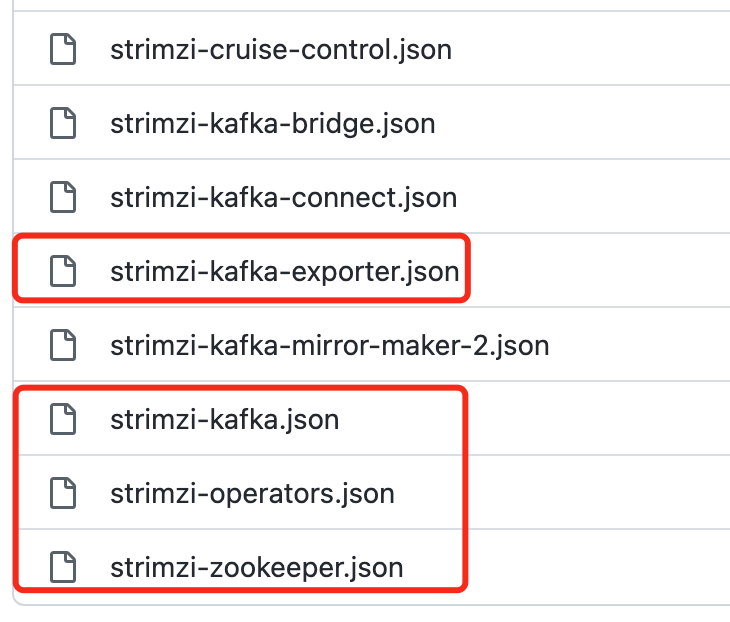
我只导入了我需要的这几个

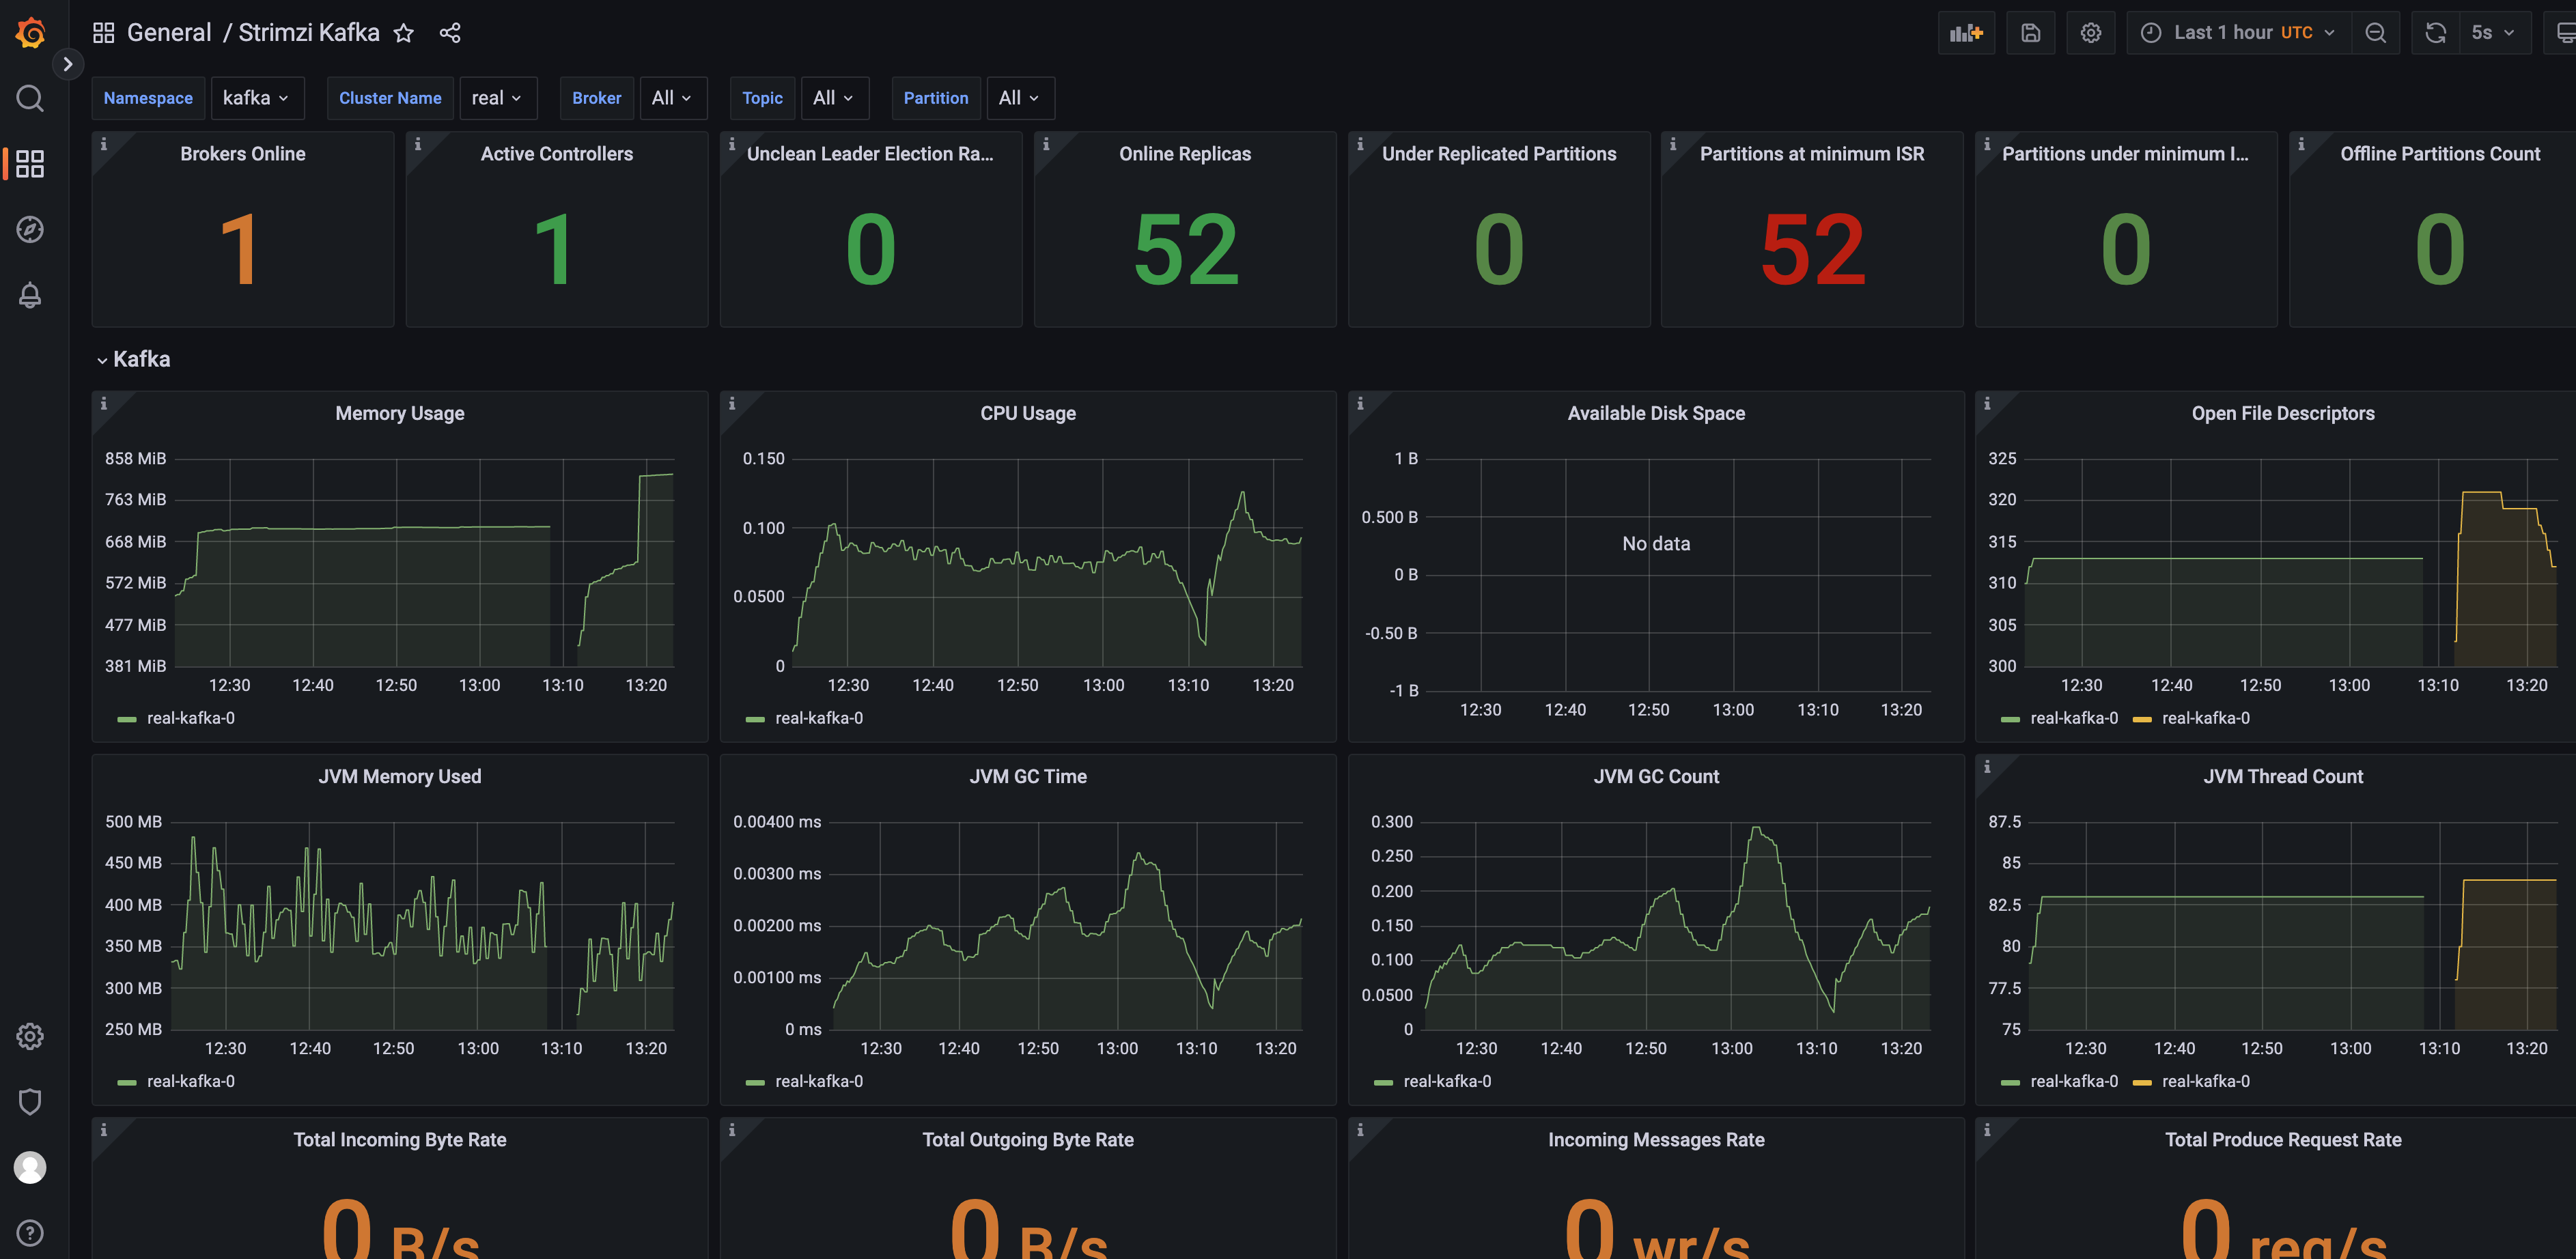
预览效果如下:


